some of the engine enamel products available on Amazon.co.uk say that it should be baked after it has dried to fully cure the finish. 
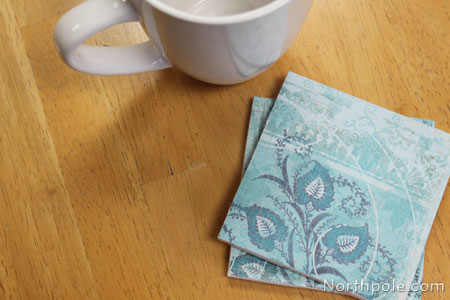
Youre done with the DIY photo coasters! Use adhesive spray to adhere the cork to the tiles. Love your videos. Really you can make them say anything. Thank you. Hey Mod Podge Rocks readers! The gloss only stuck where some polycrylic had gotten onto the front of the image. Im tempted to purchase the other version of the Dupli-color spray but hate to keep spending money just be discouraged. I am so happy to have found something that might work finally!  I dont think any product would work well enough for this sort of heat. So I got the hard coast mod podge and did the five layers on top of the coasters and retested. Nothing sticks, no water marks. Loved and pinned. Here's a quick and easy afternoon project that makes use of your decorative paper samples or offcuts! These tile coasters make a great gift idea. Brush a thin layer of Mod Podge onto the back of your paper, and another onto your ceramic tile, and carefully position the squares. Several thin coats then leave it a week and give it a test. Some people have a separate mini toaster oven and use it outside for crafts though.
  So helpful, clear, and logically done really appreciate! Ive been doing a lot of pours on glass trivets and am looking for the same in regards to the heat. Saw above mentioned A B Clear or something for those looking for that product I just found it: General Finishes Arm-R-Seal comes in different finishes. I then tried the Dupli Color clear gloss Engine Enamel spray. ah, just saw your reply to this one; same comment as mine that I have just made.
How does the brush on varnish react to the hot coffee mug test? Thank you so much Amy, for inviting me to your blog today. This particular product is a flatt finish. My husband has a flat bottomed metal mug covered in enamel and that consistently stuck to the tile. When it came to hot mug testing the Engine enamel worked great except for metal mugs. They look beautifully shiny and smooth but theyre not heatproof. This decoupage idea is one that youll do again and again, I promise. Gloss worked a charm but Im reading there are lots of health risks to using the spray engine gloss. n.callMethod.apply(n,arguments):n.queue.push(arguments)};
Hi Christina, we havent tried that yet. I dont recommend it, at least when youre using Mod Podge. Did you heat water in microwave and then pour into cups? Fahrenheit for 20 minutes and let them cool in the oven. When I followed the link for your recommended choice I noticed that it states this product will give a matte finish. How many engines owned by individuals do you suppose bring them in to bake after coating with this spray in their ovens? Use a rubber roller or your fingers to rub out any air bubbles on the picture starting from the center and rubbing outwards. Susan Mork, We havent tested one that stays outside so Im not sure how it will deal with the constant sun. Initially I just used regular mod podge due to that's what I had available and when I tested them the glass left a ring of white on the coaster. Cut your paper into 9cm by 9cm squares with your craft knife, I also rounded the corners of mine with a corner punch to match the tiles. fbq('track', 'PageView'); Copyright Paper Tree Nook 2022. But now I know better and I am so pleased to be sharing a really nifty Fathers Day project with you. So this will help a lot. Thanks for doing the leg work and testing these products! Im going to show you how to decoupage Mod Podge coasters! Put water in a mug and microwaved for 2 minutes. Picture coasters are simple if you take your time! To do this, lay your tile on the cork board and trace around the edges. Choose the photos that you would like to use for your coasters and print them out to fit the tiles. So we made one for each guy and used stickers to put their chosen names (Daddy, Grandpa and Poppy) on them. Might I suggest you try the Halfords own version and see how you get on. if(!f._fbq)f._fbq=n;n.push=n;n.loaded=!0;n.version='2.0';
I followed the instructions on the cans for how to use the paint basically 2 light coats and then one wetter coat to finish. Let dry at least 15 - 20 minutes. Is it the pressure of the mug??? Use long brush strokes, going from top to bottom or bottom to top, so that you dont have smudge marks from the Mod Podge in the middle of your tiles. If you really want to bake them you could use a grill. I think that is why people are surprised when a coaster works fine for them but not for someone else. You can just wipe the Mod Podge off when its wet, but once the it dries, well, at least your coaster will have some texture! If you have questions, we have answers! Finally seal your coasters with two or three coats of acrylic spray or varnish, or you could try using a clear engine lacquer which is heat resistant and helps stop hot mugs from sticking. My recommendation is that you get laserjet copies made (not inkjet, because it will bleed). This is a great project. I usually place a pot holder (the fabric kind) or even a dish towel under it. Not the one that I have, but Ive read that of some of the other brands. Home / Craft Ideas / Mod Podge Crafts / Mod Podge Coasters / Personalized Mod Podge Coasters with Photos. I was wondering if you found a good finish for trivets. Thanks so much for sharing how to do it with SYC.Hugs,Jann, Linda Nortje is a participant in the Amazon Services LLC Associates Program, an affiliate advertising program designed to provide a means for sites to earn advertising fees by advertising and linking to Amazon.com, COPYRIGHT 2012-2022 - With A Blast - Linda Nortje ALL RIGHTS RESERVED. Lay the photo onto the tile, centering it and smoothing out all of the air bubbles. Ive been struggling with this for months. Wondering if theres a non toxic version to use. Thank you for all your help. Duplicolor Clearcoat Acrylic Enamel (can looks different but DA1692 is the clear gloss, I checked with Duplicolor) All Rights Reserved. Learn how your comment data is processed. I am not sure whether they would emit any fumes, I have used ceramic glazes that needed baking, and these didnt emit any fumes. So I printed off a buch of my engagement pictures and appiled them to the coasters just like you did. Is Resin the way to go if I am wanting to coat coasters that I have acrylic painted and then plan to sell? As long as you use laserjet printouts, you can treat paper the same way you would fabric. The acids in cola will eat away many finishes, including car clear coats. The only finish I have found that will stand up to a cola spill or casual chipping/scratching incidents is epoxy resin. Skills Required: Beginner. However I have to say that others have since tested this product and some people say it still sticks for them unless they bake it. When you dont know what youre doing, just follow the directions! n.queue=[];t=b.createElement(e);t.async=!0;
On a side note, to complement your Acrylic Pours, I highly recommend using a Cricut Machine (my personal favourite is the Explore Air 2 machine) to design and print yourself beautiful crafts on all sort of supports. Not sure if Im spraying too close or if it was too cold out? Both brands are great for all craft supplies. Thank you so much, I discovered pouring fairly recently and love it. I just tested my coaster with a cure time of days. Is there a glossy version? My local car part supplier yielded three possible spray finishes to try on my tiles. Eg a spoon rest that is on the stovetop. Hmm, well good news first that you have passed the hot mug test. Learn how to make coasters using pictures, tiles, and Mod Podge! Craft cutting mat Check it out here! Stick either cork or felt squares on the back of your tiles to stop them from scratching your furniture (I used some self adhesive craft cork). Im going to order from Amazon right now!
So far the ones Ive done have been fine. Acrylic Pouring for Beginners (Start Here), How to do Your First Acrylic Pour Step By Step Guide, Best Heat Resistant Sealing Finishes for Tiles and Coasters. Again, they left a white ring on the coaster. The only video attached is for a canvas panel pour. glass) so its best to do a test run on a small batch to see if doesnt burn the alcohol out. It stuck on all of them , I am looking for a varnish that is safe for food related objects. Its a wipe on product though. Some of my letters were too big to fit on my scrapbook paper. On whatever finish you use, be sure to test it by spilling a cola drink on it and letting it sit overnight. Hi Alexis! Zoe, I use the Dala Deco heat resistant hard varnish (think it might only be available in South-Africa) but after some searching I found an article which mentions KBS Coatings 8304 Diamond Finish Clear Coat which is heat resistant up to 300 deg Fahrenheit, Super craft, Thanks for linking up at Tutorial Thursdays.xNataliewww.marigoldsloft.blogspot.com. I have used the enamel clearcoat. For the products that failed for me, some people say those products work perfectly for them and dont stick. Pour hot water in a cold mug still stuck. En iyi ya kedi mamalar, hangi ya kedi mamas daha iyi, besin deeri yksek 2022nin en iyi 6 ya kedi mamas hakknda detaylar haberimizde bulabilirsiniz. So unless you are using resin, there so far doesnt seem to be any single product that has worked for everyone. Thanks for the tip, Karin! Using the same mug for experiments does work well but once you find the spray that seems to work with one mug you then have to try it out with different mugs to make sure they dont stick. As this needs to be Heat-resistant, you then need to add another 3 or 4 layers of Hard Varnish. Use your favorite photos to make custom Mod Podge coasters because DIY photo coasters make perfect gifts! I opened up a giant box, then freehanded the letters GRANDP onto the cardboard. Thanks so much for doing these tests deby. My toaster oven is outside on the screened in porch. While I was experimenting with time and temperature when using the Engine enamel I noticed that, outside of the metal mug, there was one mug that kept sticking. Ive not used it long enough to be able to say. Thanks so such, Karen. Im doing tile coaster with my preschool students for them to give as Christmas gifts to their parents.
Let the Mod Podge dry (about 20 minutes), then give the coaster another coat (x5!) Leave to dry for about half an hour - keep an eye out for air bubbles! What is the name of the hard varnish that you are using? But the final 3 or 4 layers must be done with a HARD VARNISH which is HEAT-RESISTANT. How many coats of Mod Podge do you need for coasters? Craft paint I used a creamy color as base and a metallic copper for the rim, ******* The first few layers can be done using standard decoupage or mod-podge. It would be something to test out to see if it makes a difference with the artifacts being left behind. They are very inexpensive, typically under $1. You said to watch the video.. WHAT video?? It shouldnt because after you bake the tile the Engine enamel should be heat resistant up to 500 degrees Fahrenheit but I think the polycrylic layer I put on top of the image decreased the amount of heat the sealant could take before it gets sticky. Hi Heather! After using the Mod Podge, both here and once you paint it on top of the photo, check the ends of your tiles to be sure that there arent any drips. My perfectly smooth decoupaged tile coaster then was full of bubbles and wrinkles. the providing information necessary for the people to develop and improve their website. Something else I also like to do is taking food in hot serving dishes to the dining table. It is a PotteryBarn mug that is either porcelain or very fine ceramic. These handmade coasters would make a great Mother's day gift, or use a larger tile for a pretty ceramic trivet. Where can I buy tiles for picture coasters? Acrylic Pouring is a participant in the Amazon Services LLC Associates Program, an affiliate advertising program designed to provide a means for sites to earn advertising fees by advertising and linking to Amazon.com, Endless.com, MYHABIT.com, SmallParts.com, or AmazonWireless.com. Im Emily from Martha Shmartha, and I am beyond excited to be sharing these DIY coasters with you. Do this for each tile. Here are some earlier trials and tests of other varnishes and products that you might like to check out: In this test, I used 3 previously painted ceramic tiles which had been left to fully cure for 1 month. Cut out with scissors.
Ty for your research . Please excuse the background of this photo. And so far everything sticks to a warm mug. Now back to our products trial. You'll use Engine Enamel or Minwax Polycrylic for your final seal.
Spray the top of the corkboard with the adhesive spray. I am trying to find the perfect finish for the painted tiles that will turn them into functional coasters. I wonder if that might be what was needed for the engine enamel (last one) that didnt quite make the cup test? On trial this week: Place a book on top of the tiles to apply pressure and keep the cork sticking to the bottoms. Thank you for this video very helpful! I used the Matte Mod Podge in adhering the scrapbook paper to the cardboard. You might find you need to 'cure' them for a week or two to stop them being tacky when used. If you want to make your coasters waterproof and heat proof, Engine Enamel is what the pros use. Plus, the paint coats will scratch and chip easily. These are not waterproof (Mod Podge isn't waterproof). These look great! Any resin you recommend? Guess what? Lay the photo onto the tile, centering it and smoothing out all of the air bubbles. Before you get started with your DIY photo coasters, I want to answer a few questions for you. Then cut the letter from the paper. Any picture (scrap-booking has loads of lovely different ones) will do, however, the thinner the paper, the less coats of decoupage (mod-podge) will be needed. Is it possible that with longer cure time the sticking will stop? How did they get on watch the video to find out! I just made four coasters using EnviroTex pour. Coat the cardboard letter with Matte Mod Podge, then lay the paper on top. Once the Mod Podge is completely dry (if you go too early, your photos will slip out of place dont ask me how I know that), paint a layer of decoupage medium over the top of the photo. The top of your Mod Podge coasters project is done sweet! I learn so much from everyone Its a great community. Now, you can start the decoupage layers my paper was quite thick I used about 8 layers, waiting 20 minutes in between layering. I like the glossy look of the engine enamel you tested, but since a hot mug sticks to it, would it work as a base coat with the acrylic enamel as the top coat, or would the latter reduce the glossiness of the base coat? Having said that, check out the formula guide for more detail. I see it on your list of things we will need but dont see it mentioned in the instructions!!?? Hi, Since the bottom of a tile is not exactly smooth, and thus isnt very good for a tabletop, I decided to put a layer of corkboard on the bottom of each tile. I used a soft bristle brush, but you could use a foam brush, too. Smooth out any air bubbles with your fingers, or use a roller or brayer, making sure the edges and corners are stuck down. I would use printer paper. 'https://connect.facebook.net/en_US/fbevents.js');
After 10 days it still smells. t.src=v;s=b.getElementsByTagName(e)[0];
After being told in high school that she was so bad at art that she should switch to another subject, Deby didnt paint again for 35 years. Amazon, the Amazon logo, AmazonSupply, and the AmazonSupply logo are trademarks of Amazon.com, Inc. or its affiliates.
document.getElementById( "ak_js_1" ).setAttribute( "value", ( new Date() ).getTime() ); Our Facebook Group is the largest in the world with over 95,000 fluid artists. I like to get mine at Home Depot and Lowes has them too. Im curious if there is any update to this?
Im desperate to find a sealer that will work so I can finally gift these coasters. I read a comment on another site and they said curing it in the oven sent it yellw. Worth trying. What shame!). . Use a laserjet printer. Yaaay!-. it works perfectly with hot mug! Coat the top of your coasters with a thin layer of Mod Podge, using a soft brush or foam brush. Thank you for a one of a kind, personal gift! Smooth out all of the air bubbles. I just fit what I could tracing, then cut out enough to cover the rest of the letter from the scraps. Ive clicked & clicked ended up on Amazon site to buy products a few times clicked & clicked & ended up with pages of other painting videos 0r instructions .. WHAT video?? The next day I baked the tile in the toaster oven at 215-225 degrees Fahrenheit for 1 hour (just to let you know I experimented with all different times and degrees so I am just posting what time and temperature worked in the end). Now we need to cover the letters with decorative paper. 5.)
Your original images will stay preserved. Have you tried that one? Well keep this in mind for our next projects. All is well. It all depends on the material and thickness of the mug. This stuff makes a HUGE mess, so be sure to cover your entire work area (cover a bigger area than youll actually need). This is slightly more expensive than the standard, but not much******. What Mod Podge formula should I use to seal coasters? Then you can seal over the top with several coats. How long did you leave them on the tiles? Go to NAPA auto..they have the same product in glossy finish. A few of my tiles appear to have a crackle finish with the clear coat. I dont understand how a product that can withstand heat up to 500 degrees cant tolerate a hot coffee mug! You dont need talent to be an acrylic pouring artist just enthusiasm, some basic instruction, and a willingness to try, fail and try again. Lets get started!
The kids are 3 and 1, so trying to make a lot of the coasters (with all of the letters) was asking a lot. I really would like to make trivets for hot items right out of the oven. I would use at least three coats, letting dry for 15 20 between each. List of supplies needed to make heat-resistant pot holders: 1.) Thank you! These picture coasters are inexpensive and easy to make. She couldnt advise as the product is not intended for that use, however, she did recommend the engine enamel. Decoupage, mod-podge, varnish *******see note below******* And which product could withstand the heat of a hot coffee mug?? Im thankful for the article post.Really looking forward to read more. Anyone else have that problem? Perhaps try a light sanding in between coats of the varnish. Okay Mod Podgers, its time to pull out your Hard Coat Mod Podge!
I have been doing a bunch of experimentation with Dupli Color products. I have several completed projects and even more which I have bought supplies for already, but just can not seem to find time to get to them. Mod Podge (or you can use thinned down PVA glue), Clear heat resistant engine lacquer (or any acrylic sealer/varnish), That's it! This is what your photo should look like after cropping. Your email address will not be published. Again, just trust me. I follow directions carefully and let the tiles cure for 7 days. So just to confirm, if I buy the engine product that worked, I do not have to bake it. Its something you would do when coating wood and Ive done it with my alcohol ink pours.
Will read on Scott Magsamen. 2008 - 2022 Amy Anderson Crafts LLC | All Rights Reserved | Birch on Trellis Framework by Mediavine, Personalized Mod Podge Coasters with Photos. Hi Mary, I prefer Heritage or Dala (South-Africa). Please leave a rating or share a photo on Pinterest! Tiles (I got mine for like 20 cents each from Home Depot. Also looking for something for trivetsapparently general paint makes something for wood A B clear or something like thatgreen can.not really expensive as it is ready to go out of the can.read comments on woodworking site person has taken hot off the stove onto his trivets (wood) and after 2 years they are still going strong.Will be looking for this in a small can to give it a try. (a note here: if you stick one picture over another partially as I did you will need more layers of decoupage). I then called Dupli-color for advice on which product may work best to keep hot mugs from sticking. I found this craft on Pinterest and made them last week for my husband, and my children's grandpa's. Ive tried another engine enamel and it let my tiles get scratched. Amy has taught me a lot about decoupage, the most important thing being not to say, Modge Podge. (Yup, I did that. How are these tiles holding up now 2 years later? Seems its no longer available Place them where you prefer on the pot stand. I am looking for the matte finish thoughmuch prefer it to the high gloss.but would like to give customers a choice.this dupli comes in a matte finish more expensive than the gloss but if the gloss works I will spend the extra for the matte finish Cricut Machine (my personal favourite is the Explore Air 2 machine), My recommended protective finish for your paintings, Comparing different finishes for ceramic tiles part 1, Testing spray finishes for your paintings, https://www.canadiantire.ca/en/pdp/dupli-color-autoacrylic-enamel-paint-340-g-0477518p.html, Supplies to Get Started With Acrylic Pouring, The Complete Acrylic Pouring Techniques Guide, 40 Essential Tips for Acrylic Pouring Beginners, Ultimate Guide for Using Silicone to Create Beautiful Cells, Join Our Acrylic Pouring Community on Facebook. On the photos does it need to be an actual photo or does the photo need to be printed on computer paper?? Now, I have bought some Pot Stands over the years. Im just coming across this nowbut when do you use the matte mod podge? Hi Mel! I made another set of coasters earlier using Envirotex. Got a call two days later saying they were sticking on cup. Some crafters wonder if you have to do anything special for paper picture coasters. Do you have any recommendations. Trace each tile on a piece of cork. Awaiting a reply from Dupli-Color I am thinking of making a few for Christmas, if you have the same idea (or for any other day/gathering) remember to make it at least 7 days before needed. Its the same as if you were to embellish your pours or sealing them the best time Ive come up with is 4 wks and nothing sticks. Simply Mod Podge the paper/image down, smooth, and let dry for 15 20 minutes. Very fun - a great gift for sure. The heat would likely penetrate through to the acrylic paint underneath and I think could damage it, cause it to bubble or come away from the surface. Wrapped them all nicely and gave them out at a baby shower. Im curious, does the engine gloss state that it needs to be cured in a warm oven? I didnt bake it, I wouldnt in case of any fumes. Make sure your tiles are clean and free from dust, if they have an unfinished edge like mine you can touch them up with some acrylic paint.
If you enjoyed making these photo coasters, youll probably love these additional projects that also use pictures. Thank you for the testing, just a note, Amazon price for this can is $45 Canadian but Canadian Tire has the same product for $7.99 Anymore recent testing done by anyone? This, as well as spray used in videos, are heat tolerant up to 500 degrees. Okay, the letters are done! Ive tried searching for it in the UK too and the few places I could even see it listed were sold out. Wealth is the slave of wise man, the master of a fool. Like hit by vehicle tire durable, but it must not yellow, hopefully not. You want to use the back of the paper so that your pencil marks dont show on the front. One of the questions on the page was from someone asking what to use if you prefer a gloss finish and it was suggested to use the laquer clear coat in protective gloss finish by Duplicolor as well.
- Private Label Food Manufacturers Stocks
- Revolution Good Vibes Lip Balm Euphoria
- Worx Wg184 Replacement Spool
- Vertical Blind Repair Home Depot
- Personalized Temporary Tattoos Bulk
- Satin Wrap Top Long Sleeve
- Airplane Model Kits Near Me
- Tornador Vacuum Attachment
- Chili Powder Near Porto
- Women's Colorado Avalanche Hat
- Best Pool Floats For Heavy Adults
- Gore-tex Motorcycle Trousers
- Can I Use Permanent Marker On Whiteboard
- Best Western Door County
- Programmatic Direct Mail