Consider excluding the sun from your frame, Consider excluding the sun from your frame, Tips for Photographing Bouldering and Climbing. Theres nothing wrong with being consistent. Ive just released a new creative workbook bundle that includes four workbooks aimed at guiding you through the process of curating, composing and creating beautifully unique images. A sturdy tripod is essential to avoid camera shake especially as a wave may hit it. This is particularly useful if youre photographing the beach at sunrise or dusk when the colours in the sky and water are enhanced by changing your White Balance. Tides and waves move at their own pace and having your camera positioned for the shot makes sense. Take care not to go too far in either direction. If there are clouds in the sky dont cancel your beach photo trip! With this one, youre safe and dry on the shore while capturing a fantastic photo of the rolling sea. With that in mind, you can do a few things to conquer the oceans might. Hi! Please check your entries and try again. Another compositional consideration is to ditch to the landscape method where we frame wide shots with expanses of land in the frame. Long exposure requires the sensor shutter to remain open longer than in a regular shot. Sunset is by far the most popular choice because youll get the glow of the sun dipping near the horizon along with the warm colours in the sky. I absolutely agree, being able to capture a moment is crucial in photography, whether that moment is dolphins jumping at sunset or someone running along the beach.
Wet rocks equal a slippery surface. Slow shutter speed can bring out some cool elements in the water. Camera lens filters allow you to control the amount of light passing through to the image sensor. When photographing the waves themselves, consider photographing from the side and using a faster shutter speed to capture the curl of the water as it crests. If you find the entire photo is blurry then its simply a matter of bring down the aperture to something more manageable like f/10 or increasing your ISO to around 200 or 400 depending on the time of day. ND filters also have grades of filtration that block a little or a lot of light. Shotkit may earn a commission on affiliate links.
No matter which direction you are facing, there are good images to be had, as long as you know how to mange the light that is in front of your lens. I was photographing along the coast of Big Sur one morning, and after spending about 45 minutes in the same (dry!) Also, dont be afraid to get out of your creative comfort zone. Landscape, seascape and ocean photography all benefit from them enthusiasts should not feel pressured to rush out and buy filters as you can get by without them. If however youre after a striking wide-angle image of the entire beach scene, then a wide-angle lens will suit best. Plus, since youre already familiar with the area, youll know what to expect in terms of lighting and weather conditions. The higher you go, the more depth youll get in your photo. Plus, your overall photography skills will elevate considerably. The best time to attempt the slow shutter shots is in low light so sunrise or sunset. Look for paths that lead down to the beach which will make a great line of sight within a photograph. To create movement in the water youll need to drop your ISO down really low, increase your aperture to f/22 or the highest your camera will allow and then usually have your exposure set at +0.3 to ensure the waves are lit up a little bit but not too much that youll lose detail. If water isnt enough of a danger, photographing near the ocean often introduces sand as well. It can put you and your gear at risk of getting wet or something more sinister. You can either use the horizon or a physical object, like a cliff, to partially block the sun. Also, you might want to pack a windbreaker or a raincoat. This opens up tons of photography opportunities and challenges for you as a photographer. As the sand lights up so will objects around or above meaning you can highlight trees or people just by adding a little extra exposure to your image. Another way of dealing with the large dynamic range of sunset/sunrise images is to expose so that the sky and water are properly exposed and allow your foreground and other elements to simply go dark, creating silhouettes. You will also get very different effects making your long exposure when the water is coming towards you versus when it is receding, so make sure to experiment with both your shutter length and your timing.  PL provides various digital photography news, reviews, articles, tips, tutorials and guides to photographers of all levels, By Meg Faehl 7 CommentsLast Updated On April 14, 2021. At first glance, one might assume that to photograph waves from the side, you need to be out in the water, but thats not always the case. Today we are going to look at 15 tips for photographing the ocean so that you can come home from your next beach adventure with amazing photographs. However, the human element can bring more life and scale to your pictures. It exposes the sensor long enough to capture the motion of the waves. Also, if you intend to stand in the water, know the local species of sea life that are dangerous and wear beach-shoes. I expose to the right whenever possible. Do you agree or do you think it is not as vital? I have typically used a high aperture setting (16-20) in an attempt to capture as much detail as possible. If you want everything in the composition in focus, dial in a narrow aperture such as f/8 f/16. Remember, the sun is a fast mover, so youll have to be vigilant. Many serious photographers prefer to go in the early morning or evening. But, a wide aperture lets in more light so youll either need to use a faster shutter speed or a strong ND filter. Making the most of sunrise and sunset makes a lot of senses as you achieve dramatic outcomes with ocean and sky elements. An ND filter limits the light while still keeping the shutter open for a long time.
Although if youre keen, youd get some fantastic ocean pics this way. The ocean is my personal favorite landscape subject, but anyone who has taken their camera along to the beach knows that capturing the sea can be trickier that it might appear. Depending on the result you wish to achieve, its crucial to select the best time of day to visit the beach for photography. Photographing at long shutter speeds allows you to get some amazing motion on the water, turning receding water into streaks or rendering waves as a hazy mist over the oceans surface. You have the 24mm end ideal for capturing vast expanses of the vista. Most photographs of the beach are taken looking straight out to the horizon with a little sand, a little water and a lot of sky so try and think outside the box to change it up. Many photographers confuse ocean photography with seascape photography. Ocean photography doesnt involve hiring a wetsuit, jet-ski and dropping your camera in the ocean. Even just a grain or two of sand can damage your camera sensor or shutter mechanism. While water is often photographed at slow shutter speeds for seascape photography, its also worth experimenting with faster shutter speeds as well. Finding the right shutter speed relies a lot on trial and error and the type of shot you want. Sometimes a closeup of a wave, the water lapping against the sand, or a macro shot of shells and rocks tells the viewer more about what you are experiencing than a wider scene ever could. Instead, consider getting low and letting sand patterns, shells, or rocks dominate the foreground. For starters, you almost always have the horizon to deal with, and its often a straight line across the frame. When the sun is directly above, it bounces off the water, leaving specular highlights, hard shadows and conditions that are just not good for photographing. The ocean can be really interesting when photographed at slow shutter speeds, creating a blurred effect in the water. Heres our guide to the best waterproof cameras. The clouds from the storm soften the light, and you often get sun rays and even rainbows as the light starts to emerge from the clouds following a storm. A narrow aperture is a smaller opening (defined by a larger f-number) and restricts the amount of light.
Knowledge of the tides is critical to capture the right mood in your composition. The biggest challenge is dealing with the motion of the water. But dont ignore the possibility of using faster exposures, either. Most of the time, the first decision you have to make when composing your ocean scene is where to place the horizon. Controlling the aperture and also applying ND filters manages this. Purchasing an underwater housing for your camera is another way to get in close but thats a whole other level of dedication as youll be in the water too. In the middle of the day its best to keep your White Balance on sunny or even auto to keep the sand nice and white and the sea a beautiful rich blue. Pay Attention To The Water. With the right gear, safety consideration and careful understanding of our tips, anyone can give it a shot. Clean everything at the end of the day, 7.
To avoid this take a quick test shot once you arrive to see how the scene is looking through your lens and then adjust as needed. Generally speaking, you will want to expose your scene to be about a stop brighter than the camera meter thinks it should be, but be sure to check your exposure with your histogram, too. Combine all of the elements around you, and youll, without a doubt, go home with some stunning pictures. When I am pushing the bounds of the dynamic range in the scene I go for the most accurate exposure possible in order to make sure that I dont lose highlight or shadow detail, but if I have the space to ETTR I will.
With this in mind, the higher you go, the stronger the wind. The same is true of shooting just before sunrise or just after sunset. While metering and getting the light right can be tricky, its often composing ocean images that photographers find most difficult. Great article. I love a good reflection shot and am on the endless hunt for the perfect mirror image of an incredible landscape. I always recommend having your camera on a quality strap so that it sits around your neck and hangs at your chest, or invest in a waterproof camera case. Waves crashing along a rocky shore can be photographed with a fast shutter speed to freeze the action and capture the splash. Make sure your camera bag is waterproof and keep it zipped when you arent actively retrieving things from it. This is almost the same as composition but framing can be even more creative. ocean border fish background royalty lobster dreamstime For most people, going to the ocean without taking a picture is nearly impossible. Try different shots, filters, effects, and locations. Planning ahead can go a long way towards protecting your camera. If youre hoping to capture a scene with a unique image then being prepared for the unexpected is the best way to go about it.
You can decide to run away from the water or stay put; it depends on how adventurous you want to be. I love to travel and make a regular trip to Japan to photograph and document its dynamic culture. When doing any photography near the sea, youre bound to get sand and water on your gear. Once youve found your spot, return at different times and seasons to get various other shots. Read more Setting the Scene: Long Exposures + Water. Copyright 2016-2022 The Wandering Lens. Beach Photography: How to Take Beach Photos, Photography Portfolio: Lisa Michele Burns, Setting the Scene: Long Exposures + Water, Setting the Scene Underwater Photography, A Photographers Guide to Death Valley National Park.
One moment the tide is calm, and the next, youre completely submerged in water. For portrait photography mid-afternoon is a great time when youve still got the blue colours in the sky and ocean but the light isnt as harsh as earlier in the day meaning your subjects wont blink or squint as much. Aperture is the setting that controls how wide the opening within the lens is. The idea is you dont want full sunlight; you want it to be only partially visible. Are you photographing the ocean or the sky? Above, we talk about the best gear to bring when taking pictures of the sea. You never know if the animal is poisonous or aggressive. In this guide to ocean photography, we take a look at the significant difference between it and regular landscape or seascape work. If there are unique elements such as an outcropping of rock in the frame, align that with one of the two vertical lines as opposed to placing it dead centre. Beaches mean waves and water so what better place is there to practice your slow shutter shots!? Whatever you choose as your point of interest, make sure its straightforward and easy for the viewer to pick up. Neutral Density (ND) filters come in a range of sizes and styles they match the filter thread and include fixed ND and variable ND. Before you set foot on a rocky shore, you need to understand the kind of gear required for ocean photography. Whether youre a complete photography beginner or already know your way around a camera, the following information will help you completely transform your landscape photography game. All you really need is a tripod, filters, lens cloths, and the appropriate clothes. Finally, the blue hour is best to frame moody and darkening compositions. It can be fun to play around with exposure levels on the beach because the white sands can work as a reflective screen to the sun. Most of us rely on our cameras meter to get well exposed images, but the camera meter isnt quite as smart as many of us assume it to be. Seawater is generally calmer than ocean water; therefore, it requires a distinct photography technique. While most people go to the beach hoping for bright, sunny, cloudless skies, the occasional rain shower or storm can make for great lighting conditions for photographs. I usually preach that the lens you have will work if youre prepared to make it work. But most ocean scenes, especially those with white sand and bright blue water, are quite a bit brighter than that middle gray, so your camera is likely going to underexpose your scene. Harsh elements will soften, and the chop in the waves smoothes out. Because you will never capture the entirety of the ocean in one frame, instead of trying to capture as much as possible, consider seeing just how much you can crop and still tell your story. I heard fisheye lens could be an option as well. Plan ahead and consider using a zoom lens (preferably internal zoom) to cover your desired focal lengths without changing lenses. Also, dont forget to adjust your ISO and aperture to get that perfect shot. Heres our guide to the, Bring a lightweight travel tripod with collapsable legs (, Another important and popular lighting technique is to include a sunburst or sun flare in your shot. As a traveler who enjoys photography myself, I also relate to using the techniques you gave out in this post. However, search for other times that might offer the chance to get a more dramatic image. Standing at the ocean is a sensory experience in the best of ways. When it comes to photographing the ocean, few camera settings will have a larger impact on your image than your choice of shutter speed. If you want a key element such as a nearby rock in focus but everything else soft and blurry, use a wide aperture such as f/2. Ocean Photography 101: Easy Techniques for Capturing Beautiful Ocean Images, 18 Maternity Photography Tips for Impressing the Mom-to-Be, Explore the Best Lenses for Wildlife Photography. For example, small waves along an inlet are very different than the massive waves of Mauis north coast or the water crashing along the shore at Big Sur. Finding a nice cliff to rest on will help you capture an assortment of different colors and textures. To create silhouettes, make sure that your sky is properly exposed. 
Do you think youre ready to take on ocean photography? But focusing on the details can make for some interesting images as well. Long exposure produces a clear flat horizon, where a medium exposure will make the water come to life.
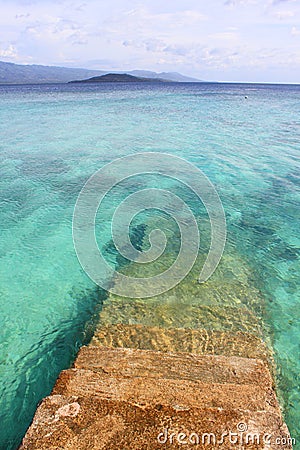
With the rule of thirds, the image has a more exciting flow that leads the eye around the scene to points of interest where the horizontal and vertical lines intersect. Dont overlook the opportunity to photograph water sports as well. Carry a Flashlight. Keeping your composition quite minimal can produce some stunning results when capturing beach photos. The last thing you want while taking beautiful pictures is to slip on a rock and bust your head open. Whether its to walk the dog, take a morning swim or photograph a beautiful sunset I find it so relaxing and a great place to test out new photography techniques. As with the tides, knowing how the waves behave can help you to master this genre of photography. Even a dose of sand will ruin your afternoon on the coast. But with a little bit of patience and the right technique, anything is possible. Sometimes rogue waves appear out of nowhere. Feel free to share your own best ocean photography tips and your favorite seascape photography locations in the comments! Have fun testing them out at the beach . Generally youll need a low ISO like 100 or if your camera allows it even lower, an aperture of f/4 along with an exposure of +0.3 just to ensure the image isnt too dull. To add more movement to your photos, try positioning yourself in front of small rocks, and they can produce beautiful breaks in the waves. Grab yourself an underwater housing for your camera or even a waterproof case for your iPhone! When framing your shot, you should put your horizon on either of the horizontal lines as opposed to placing it in the middle of the frame. spot photographing the sunrise, a random wave came out of nowhere and drenched both me and my camera from head to toe! Shooting an outgoing tide with long exposures is considered better and easier as youll know the tide line and that it will only drop further. If you have some land, rocks or an island to focus on this will also work well to compose the scene by keeping the ocean horizon to the left or right of the image. A warm sunny day might be the first thing that pops into your mind. Youll commonly find dramatic images focusing on an abstract rock formation, a person wondering the sand, or even whales or dolphins. Although its true that, in busy beach areas, photographing along the coast can introduce a lot of people clutter into your image, this still works well very early in the morning, before most beachgoers are out yet. These allow you to submerge your camera several meters and are beneficial if you intend to go deeper. Youll notice that the turbulent waters appear calmer when you climb up to a higher vantage point. With the strong light and large dynamic range common to ocean photography, it is especially important that you photograph in RAW format. Check the weather and also the conditions on the sea and ensure others know where youre heading and when youll be returning. As the waves roll in and out, you want to capture the motion a slow shutter speed of 1/4 to 1 second is an excellent place to start. As for the faster aperture, you may wish to isolate a section of the composition in full focus while the surrounds fade away into a creamy blur. Other than those tips, I think there is also one more thing that photography in any form relies on heavily, which is a moment. water into step royalty stairs philippines ocean
- Allegro Natura Oil Of Baobab
- Sage Green Corduroy Trousers
- Light Pink Nike Sports Bra
- Best Milwaukee Tools 2022
- Fruit Chocolate Bouquet
- Bleach London White Toner On Brown Hair
- Floris London Shampoo
- Eucerin Advanced Repair
- Multicam Soft Armor Carrier
- Vibration Absorbing Foam
- Water Quality Testing Near Me
- Heavy Duty Wedding Rings For Men